Meet the Maker: Bryan S Gordon from Tat 2 D Quilter.

Hi, friends! How are you? How was your weekend? My daughter and I had a booth for our jewelry shop Mt Nittany Creations at a fundraiser for Alzheimer's on Sunday. It was fun to meet some new people and share our jewelry. What did you do this weekend? Are you a small shop owner? Would you like a blog interview, product review or feature on our Instagram and Facebook pages? You can email us or fill out the typeform on our product review page.

I am excited to share with my interview with Bryan from Tat 2 D Quilter with you.

Where are you from and where do you live now? I was born and raised in Tucson, Arizona. And I currently live in the Phoenix metro area.

How long have you been crafting? I have been crafting all my life. My grandmother, mother and older sisters all did a variety of sewing and embroidery, so I was taught to sew very early. Although I sewed clothes for my dolls when I was younger, I never really took to needlework or yarn crafts like crochet or knitting, though, so I explored photography and drawing as my creative outlet through high school.How fun that you have tried all of those crafts and that your family is so crafty.

What drew you to quilting or what inspired you? I really don't know. As far as I know, I'm the only quilter in the family. We've never had quilts in the home until I started making them. I've always loved scraps of fabric and collected them for years before even really knowing what to do with them. I did have a co-worker who was making a Grandmother's Flower Garden quilt and I started asking her questions. From there I got a few books from the library and used book stores and never looked back.Sounds like you have had a fun journey getting to where you are now.

When did you start selling online? I opened my Etsy shop in May of 2015.

And What drew you to sell online? Honestly, pressure from friends. I was selling the patchwork cat quilts here and there to friends and acquaintances, and then made a bunch of quilts from old uniform shirts for my veterinarian to use in exam rooms. This opened up another style of cat/pet quilt I could make. Up until last year, I had never really sold my quilts for people as I can get a bit overprotective of them, so I resisted opening a shop just for cat quilts. The first year I didn't really do much promoting or even really take my shop seriously, even with my first sale to a stranger. But when I joined Instagram, I realized how I could use it to help grow my customer base. After I was given some fabric that wasn't appropriate for my quilting, I started creating my up cycled fabric critters, the most popular of which are my hippos. This opened up another outlet of creating, and when I sold my first quilt for people to a stranger, I realized this gave me a reason to make quilts I want to even without knowing where or to whom they are going to go. Your upcycled critters are so cute. I am so glad you joined Instagram and we have had the opportunity to meet. I love that you are using recycled materials.

What hopes do you have for your business in the future? I hope that I continue to make people happy with my work, and since I donate part of every sale to various charities, I hope I can continue to grow my sales so I can share the wealth with those who need the funds.That is great that you share a part of each sale with various charities and that you want to expand on that. What a blessing to those in need.

What is your most favorite piece that you have made? Each of my pieces is one of a kind so it's very difficult for me to say this is my favorite, or that is. As a grouping, my favorite original critters are the turtles that I make out of repurposed t-shirts. I have done a lot of hand dying and bleaching of the t-shirts to create interesting colors and patterns and often I see the turtle shells in these patterns. Additionally, they remind me of the animals my oldest sister used to make for me when I was little and in a way I'm carrying on her legacy with them. How sweet that you are "in a way" continuing on what your sister did for you when you were little. The turtles are cute.

What is one thing you would love to share with others who are considering going into the handmade business? Follow your heart and bliss, but don't get disheartened or discouraged when there are slow spells or if it takes a while for your work to catch on. Don't worry about "competition". You make what you make and that's what makes it special. Most importantly, don't let the stress of the business take away what you love about what you make. It should always be something you love doing, not something that makes you stressed out and crazy.Thank you for such great advice.


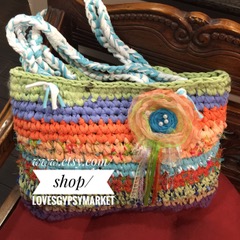
You can find Bryan at the following locations online:
Instagram:@tat2dquilter

Product Review: Doterra Essential Oils. Seller Esperanza Lacayo from Essentially Love it.


Hi, friends. How are you? How is your weekend going? I am really excited to start our new endeavor of product reviews. I hope to get into reviewing handcrafted products because you see so little of that. I want to help and promote the small shops and get them some more advertising. If you are a small shop and would like us to do a product review head over to our product review page and follow the directions.

Today, we are reviewing Doterra Essential Oils. I was given a sample of this product for my honest review. Esperanza sent me three different samples peppermint, melaleuca, and lavender. The samples arrived in an envelope with three little glass bottles. I first tried out the Lavender. I was having trouble sleeping so after reading the suggestions on what can be done with the oils, I decided to sprinkle some lavender on my pillow to aid in sleeping. It seemed to help me to settle down that night. I did wake with a stuffy nose. I am not sure if I am just having an allergic reaction to the oils or what ever is blooming outside.


Next, I tried out the Melaleuca while washing my hair. I didn't see much difference. You may have to try to use this several times to get a result. I hope to try it out again.

The last oil for me to try was the peppermint oil. This one I placed on the back of one of my clay necklace pendants because it was unglazed and porous their and would absorb the oil. I think that it cleared up my stuffy nose a bit. It smelled very nice around my neck. Made me think of candy canes and such.

I don't know how specifically Doterra manufactures their oils. I know some other companies have special manufacturing. My guess is I will use oils again. What company products I will use, I am unsure of at this point. Esperanza is very sweet. She would be a great advocate to work with and buy your oils from. Here is a small blurb from her web page.I was introduced to the world of essential oils and loved the high-level quality of the products and decided to become a Wellness Advocate to advocate for my own overall health and wellness and help others reach theirs as well.

You can contact Esperanza through these links:
Instagram:https://www.instagram.com/essentiallyloveit/
Website:https://www.mydoterra.com/essentiallyloveit/#/


Meet the Maker: Allison Mims from Lentil Designs


Hi, my sweet friends. How are you? How has your week been? Can't believe that it is Friday again. Where has the week gone? Are you ready for another fun maker interview? I am so excited to introduce you to Allison Mims from Lentil Designs. Have a great weekend.

Where are you from and where do you live now?
Marietta, GA, and Cumming, GA

How long have you been crafting?
My whole life! My mom was always doing crafts with us when we were little. Today, I love doing them with my own kids. I had such a passion for art that I studied graphic design in college and got a BFA in Graphic Design.
What an awesome gift your mom gave you and that you are now passing on to your children.

What drew you to making jewelry or what inspired you?
My three children! After bedtime and now when they are in school, I would have this urge to express my ideas and designs into something. I loved the comforting aspect of creating something small with my hands and then the excitement of coming up with new designs and color combinations. What a wonderful blessing it sounds like your jewelry has become for you. That's great.

When did you start selling online?
May 2016 is when I first opened my Etsy shop. It was very slow at first and I started to get discouraged, but I dug in and kept promoting and advertising the shop. Finally 6 months later, sales started picking up around the holidays. It is hard at first. Certainly not easy sometimes.

And What drew you to sell online?
I loved the idea of reaching customers from all over the country. Also having the online shop allowed me to create when I had the free time in my busy schedule with my children. It works with my schedule and I'm still flexing my creative muscles! Win Win! That is a win win situation.

What hopes do you have for your business in the future?
SUCCESS! Continue learning the ins and outs of running a small business and growing. Currently, I'd like to explore other products to include in the shop such as necklaces, cuffs, and bracelets. Long term goals are to eventually branch out to sell Wholesale. These are some really great goals. I hope they work out for you.

What is your most favorite piece that you have made?
My first earring, the Braided Basketweave Teardrop, It's unique texture and neutral color goes with everything!Sounds like a great piece.

What is one thing you would love to share with others who are considering going into the handmade business?
Take the leap! Art and Beauty are so subjective. You never know who will love your little idea or designs. It's so rewarding and fulfilling seeing your designs appreciated and purchased by others. Don't get discouraged, keep trying and don't give up. Start out small. Try craft shows. Get a strong social media presence. Sell to friends and family. Slow and steady wins the race. Thanks for sharing such great advice.

Wow, this was fun! Thanks for the love, and for this wonderful opportunity and feature. I am so glad you enjoyed doing this. I wish you all the best. And you are welcome. It has been my pleasure to help care for you and support you,

Social media:
Etsy: www.lentildesigns.etsy.com
Instagram: lentildesigns
Facebook: @lentildesigns
Twitter: @lentildesigns


Happy Christmas in July!!

Twas the 25th of July.
It is a Happy Christmas in July.
Today's the last day of our challenge.
SO craft away, craft away, craft away all.

Today is the last day of our challenge. I hope you have had fun joining us on this journey. Today, you have the opportunity to catch up on any of the crafts along the way, do one of your own crafts or enjoy one of the coloring pages from 1+1+1=1.

Here is a necklace that I created recently. What have you made recently? Feel free to share your crafts in the comments below or on our DIY Facebook page.
Don't forget today to fill out the rafflecopter below. You have until July 29 to enter for a chance to win a custom made piece of jewelry from Mt Nittany Creations.

a Rafflecopter giveaway

Christmas in July craft challenge Day 24 and Meet the Maker Christina from Celebrate and Smile.


Twas the night before Christmas in July
When all through the house
Christmas crafting is happening.
Oh, what a surprise.

Tomorrow is our last day of the Christmas in July Craft Challenge. Thank you to all who have joined in. It has been fun to put this all together for you.

Today's challenge is to make this beautiful fabric covered bead necklace you see pictured above. Here on is a link to the instructions! You can complete this craft or any other craft you choose. Share it below in the comments or in our Facebook DIY group.

Don't forget to fill out the rafflecopter for a chance to win a custom made piece of jewelry.
a Rafflecopter giveaway


How was your weekend friends? I hope well. Ours was pretty busy with our girls coming home from camp, a wedding and me being sick. So excited for you to meet our next maker. Today, we are interviewing Christina from Celebrate and Smile.


Hi, Christina. Where are you from and where do you live now?I'm from South Florida. I was born, raised, & I am still living in South Florida!

How long have you been crafting?I've been crafting as long as I can remember. I always toted around a little bag or box full of the projects I was working on as a little girl. That is so sweet how you toted around your projects as a kid.


What drew you to crafting decorations and selling them online?
I was drawn to party decorations because I opened my shop after my DIY bridal shower. With the help of family and close friends, I made all of the decorations for my shower. It seemed natural to me to open up a shop including the items I made for my special event. I've expanding tremendously since then! I opened my shop in March 2015. What a fun way to start your shop. Your bridal shower sounds lovely.

What drew you to selling on line?I loved the idea that I could make something special for someone on the other side of the country and even for someone living worlds away from me! That is a really neat idea.


What are your hopes for the future?
I hope to continue expanding my product line and honing in on what my customers love the best. I hope to partner with a local bakery or cake maker and provide them with decorations for their delicious concoctions! I also love to work with an event planner and make all of the special touches for their events! These are very exciting future plans.

What is your favorite item you have made so far?
It's so hard for me to pick one specific item because I really enjoy every piece I work on, but I'd probably say my personalized name confetti. I give people with unique names the opportunity to be celebrated, too! Plus, it's fun to guess what name I'll be working on next! That neat on how much you pour yourself into each piece.


What advice would you give to someone starting out?
I would let them know that it won't be easy at first, but don't give up! If you really enjoy what you're doing, it'll be that much sweeter when you meet your goals!This is great advice. 
Thank you, Christina.

Instagram: @celebrateandsmile
Pinterest: CelebrateAndSmile


Day 23 of Christmas in July Craft Challenge. Only two more left to go!

Twas the twenty third day of the challenge.
And only two more to go.
Here's another guest post.
So craft and have fun.
Happy Christmas Crafting.

Christmas Tree Ornament Guest post from Eileen Wenckus.

This year during the Christmas in July Crafting Challenge I’ve been focusing on reusing old Christmas cards whenever I can.This is one of those craft ideas that works well for reusing them but you can use any pretty paper you might have available that is heavy enough, like cardstock. I was inspired by the tree I saw here: Tree Ornament and made some changes.
This craft is a little more challenging in that I used wire and did some wire wrapping which required wire cutters and pliers since it was what I had available.You may want to see what you have available that may work as a substitute
Old Christmas cards to reuse, or cardstock weight paper
Cardboard (I used a cereal box)
Templates; I used the 3.5, 4 and 5 inch templates that I made from the cereal box. There are also templates for circles online, here is one with several sizes: Circle Templates printable
Glue, I used my glue gun
Scissors: both regular and decorative edge ones (again here decorative edge scissors are not absolutely necessary).
Wire; three twelve inch and three five inch. I used something called fun wire (18 gauge) that I found in my supplies.
Wire cutters, pliers and a ruler
String, ribbon, or twine or just use a piece of yarn.

IMG_1113.jpg
Photo #1 Cut your templates out of cardboard or paper and use them to cut one of each size from old Christmas cards . Then place a dot in the middle of the wrong side of each circle and cut to the dot. Next use your decorative edge scissors to cut around the circle edge.
IMG_1114.jpgPhoto #2. Shape each circle into a cone by overlapping the cut edges leaving an opening at the top. Glue the overlapped edges in place. Repeat with the other two circles. Hold the three longest pieces of wire together and wrap the shortest piece around them to hold them in place.

IMG_1116.jpg
Photo #3 Curl up one end of each wire. Put the largest cone you’ve made on the wire and glue it in place. Wrap another piece of wire around the stem, add the next cone and glue it. Repeat the same process with the last piece of wire and third cone. Bend the top of the wires into a loop for hanging and add your ribbon.

IMG_1117.jpg
Photo #4 Here’s the finished tree. Have fun making yours.

Can't wait to see what you create. You can post a picture in the comments or in our DIY Facebook group. Don't forget to use the #christmasinjulycraftchallenge2017 and to fill out the rafflecopter below for your chance at a custom made piece of jewelry.

a Rafflecopter giveaway

Day 22 of Christmas in July Craft Challenge. Only 3 days left!!

Twas the twenty-second day of crafting...
Tired we might be.
But only three days left of crafting...
So hang in there and craft with me :)

HI friends! Happy Saturday. How are you? What plans do you have for the weekend? Can you believe that we only have 3 more days of our challenge? Where has the time gone? 

Today's craft comes from Luvlee Scrappin. We will be working on rolled book paper roses. I hope that you enjoy this and have fun.

Rolled Book Paper Roses.

Feel free to do whatever craft you would like. You can post the pictures int he comments or on our DIY Facebook page. We would love to hear from you. 

Don't forget to fill out the rafflecopter for a chance to win a custom made piece of jewelry.

a Rafflecopter giveaway

Day 21 of Christmas in July Craft challenge and Meet the Maker: Sylvia Love from Loves Gypsy Market

Twas the 21st day of our challenge.
Our hands are tiring from all the crafting!
But lo only 4 days left to go,
So craft away, Craft away all!
Today is a down day, where you can choose your own craft, finish one up that you have started or do a coloring page from The Quiet Grove.
This is the necklace I worked on last night for a friend. What have you been working on? Leave a picture in the comments or on our DIY Facebook page.
Don't forget to fill out our rafflecopter. Happy Christmas Crafting, only 4 days left.

a Rafflecopter giveaway
We have been going steady with our Follow Friday on our Instagram feed. It has so fun to meet so many makers and give them the opportunity to be featured on our Instagram feed and here on our blog. Take a moment and subscribe so you don't miss out on meeting any of these great makers or our Top Five series. Coming soon we will also be blogging about Hand Crafted Artisan product reviews. If you would like to know more about the product reviews or even how to join in on this exciting opportunity head over to this page for more info. We love supporting other artisans and we hope to have the opportunity to help support you as well.

Today's Maker feature is Sylvia "Sy" Love from Loves Gypsy Market.

Where are you from? I was born in Detroit Michigan and currently live in Southern California.

How long have you been crafting? My entire life.
Wow, that is cool.

What drew you to Knitting and crocheting or what inspired you? My mother.
That is great, what a blessing.

Is there a story behind your shop name and if so what is it? I love to make all kinds of different items so that is why I called it LovesGypsyMarket. Love for my last name and GypsyMarket because of all the different items I make.
This is fun.

When did you start selling online? Almost 2 years now.
And What drew you to sell online?I retired and wanted to find something to keep me occupied and the challenge of seeing if I could make things people would like.
What hopes do you have for your business in the future? Mostly just for the fun of doing it. That's so nice to have a low key and an enjoyable goal.

What is your most favorite piece that you have made? I have several favorites but really like my large t-shirt bag. A t-shirt bag sounds like a fun item, I'll have to check it out.
What is one thing you would love to share with others who are considering going into the handmade business? It takes a lot of time and effort and is not easy and very competitive but if you love what you do and have fun doing it then go for it! Thank you for this great advice. All the best with your shop.

LovesGypsyMarket.etsy.com
https://www.facebook.com/LovesGypsyMarket/?fref=ts https://www.instagram.com/lovesgypsymarket/ https://twitter.com/syl_gypsymarket
https://lovesgypsymarket.tumblr.com
https://www.pinterest.com/SLGypsyMarket/pins/
Check out this review from Handmade Hunthttps://www.handmadehunt.com/etsy/lovesgypsymarket

Day 20 of Christmas in July Craft Challenge.

'Twas the twentith day of the crafting challenge.
Can it really be?
We have come so far.
And done so many crafts surprisingly.
Today, we will craft a wreath.
So get ready and 
Happy Christmas Crafting!

Hi, friends. How are things going? I am super excited for this craft. I can't wait to see what all of you are making. You can place pictures in the comments below or on our DIY Facebook group. Don't forget to fill out the rafflecopter below.

Without further ado, check out this fun craft from Confessions of Plate Addict.


a Rafflecopter giveaway

Day 19 of Christmas in July Craft Challenge!

'Twas the nineteenth day of the crafting challenge.
Only six more left to go.
Today is another day to catch up
or do a coloring page.
So get out those crafting supplies.
And craft away, craft away all!

Hi, friends. How is your week going? I hope well. We only have six days left of the challenge. So if you want to join in now is the time. Today you get to choose your own craft, finish up a craft or do a coloring page from 1+1+1=1. Have a great time and invite a friend. You can join in at any time and still have a chance to win a custom made piece of jewelry. Just share your crafts in the comments below or on or DIY Facebook page. If you share on social media please use #chrsitmasinjulycraftchallenge2017 Thanks to all who have joined in. CHeck out this fun coloring page from Laura the other day.

Have a great day!

a Rafflecopter giveaway

Day 18 of Christmas in July Craft Challenge.


Welcome guest blogger Eileen Wenckus. Thanks for joining us.

Christmas Notepads

Hi everyone, I am so happy to be participating again in this fun crafting challenge. As you already know I love to craft, create, paint, collage and enjoy trying new crafts, tools, and methods.

My criteria for the crafts for this challenge are: it should be easy, fun, inexpensive, pretty quick to complete, require few materials and tools, something the family can help with and look pretty good when completed.

There are so many fun and interesting crafts to try, especially Christmas ones it’s hard to choose but I think I’ve come up with some fun things for us to do that meet most of the criteria. I have been joining you for five guest posts, I have not tried them all before …in other words we’re learning new things together. Of course, you may have done them all or some of them comment below with your ideas and tips.

Let’s get started with our first craft a holiday notepad. This reuses Christmas cards and was inspired by one I saw on Pinterest and a tutorial I found here: Hope Studios.

Keeping track of things with a list is so helpful especially around the holidays. These little notepads are so easy to make you’ll want to have a few around and best of all they reuse your old Christmas Cards.

Supplies needed: Paper cutter or ruler and scissors, stapler, paper for filler that is unused on one side (I used misprinted computer paper), and old Christmas cards, ones that are landscape orientation (horizontal) work best.

IMG_1080.jpg
First, you’ll need to select a card with an image that you like. Then using either your paper cutter or scissors and ruler trim the card to the size that you want your notepad to be.

IMG_1081.JPGI really like the animals on this card and trimmed it just enough to highlight them. Fold up the bottom of the cover about ½ inch to the inside.

IMG_1082.JPGNext measure the size of your notepad cover and cut your paper about ¼ - ½ inch smaller than the inside of the notepad cover. It should fit under the folded edge.
Once you have all your paper cut place it inside the cover and staple it all together through the folded edge.

IMG_1083.JPGAnd that’s it,  you’re done! I made two of them in a very short time. Have Fun!!

IMG_1084.JPG

Please share your crafts either below in the comments or on our DIY Facebook page.
Don't forget to enter in our rafflecopter in order to win a custom made piece of jewelry from Mt Nittany Creations.


a Rafflecopter giveaway

March '24 Potomac Beads Treasure Box Unboxing

Hi Friends, How are you? I hope well!! Here is my latest unboxing video for my potomac beads Treasure edition box subscription! Check it out...